How to temporarily disable antivirus software in Windows 11 for optimal program installation or gaming performance. When installing certain programs, game patches, or modifying specific files, you may encounter common issues such as: Windows Security or some people know it as Microsoft Defender (the antivirus for Windows 11) It seems to treat our files as suspicious and blocks them without even asking. Honestly, Defender does its job really well, but sometimes we just need to temporarily disable it to keep things running smoothly—especially when we want to play games without any interruptions.
Let me explain it to you in simple terms. Where do I click to turn it off, and when should I turn it back on? It is easy to understand and will be divided into two cases: 1. Temporarily disable your antivirus software. And 2. No need to block, but only allow certain files (safer).
1. How to temporarily disable Windows 11 antivirus
This method will beTemporarily disable the antivirus. This is for those who need to perform heavy tasks or play games smoothly without the strict file scanning processes of Windows Security slowing down or lag your system. This method can also be used when installing programs that require temporarily disabling antivirus software during the installation process.
1.1 Open Windows Security
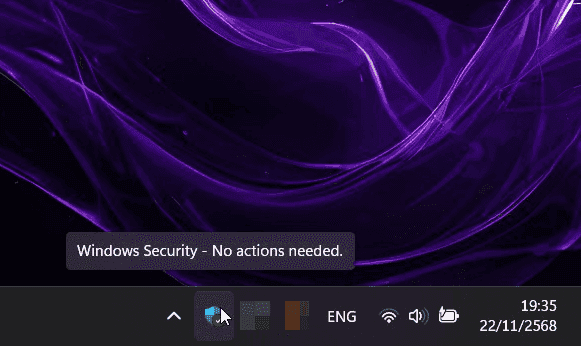
- Double-click the Windows Security icon in the menu tray (bottom-right corner of the screen).
- Or press the button. Start Then type "Windows Security."
1.2 Select the Virus & threat protection menu
- Scroll down to the menu. Virus & threat protection settings
- Click here. Manage Settings

1.3 Turn off “Real-time protection”
- There will be a switch to press and turn off in the position. Off
- When you click to close Windows, it will ask for confirmation again. Click Yes

1.4 Disable Additional Protection
In addition to Real-time protection, you can also choose to disable other protection features if disabling only Real-time protection is not effective, such as: Cloud-delivered protection And Automatic Sample Submission
Once closed, Windows Defender will immediately stop real-time file scanning, allowing you to play games or work more smoothly. You will also be able to install programs or edit blocked files more conveniently.
Note:It will automatically reopen when the device restarts or after a certain period of time has passed for system security.
1.5 When should it be reopened?
Once you've finished playing games, working hard, installing software, editing files, or managing anything you added to your device, it's recommended to restart immediately. If you leave it off for too long, your device will have no protection and will be more vulnerable to strange files.
2. How to allow specific files without blocking all of them (Recommended)
This method willNot all protection is disabled. However, permission or exemption from inspection will only be granted for specific files that it has incorrectly detected.False Positive) which is safer because other protective components are still fully operational.
For those who need to install various programs but are blocked, restricted, or have files deleted by Windows Security because they are considered suspicious, resulting in installation failure. Here's how to proceed:
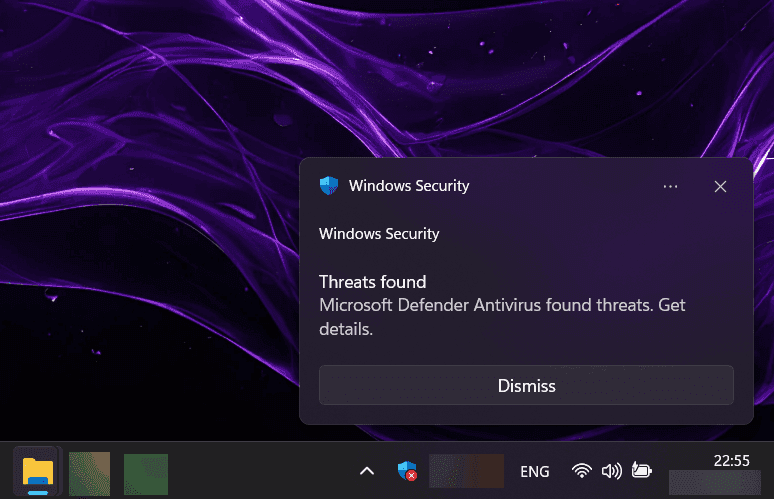
2.1 Notification of Detected Malicious Files (Threats Found)
- Normally, when we are installing a program and a file is blocked, a notification message (Threats Found) will appear, along with blocking the file from running.
- Click on that notification message.
2.2 Allow files to run (Allow on device)
- Press the down arrow to expand the details.
- Tik “Allow on device“"
- Then press “Start Actions“"
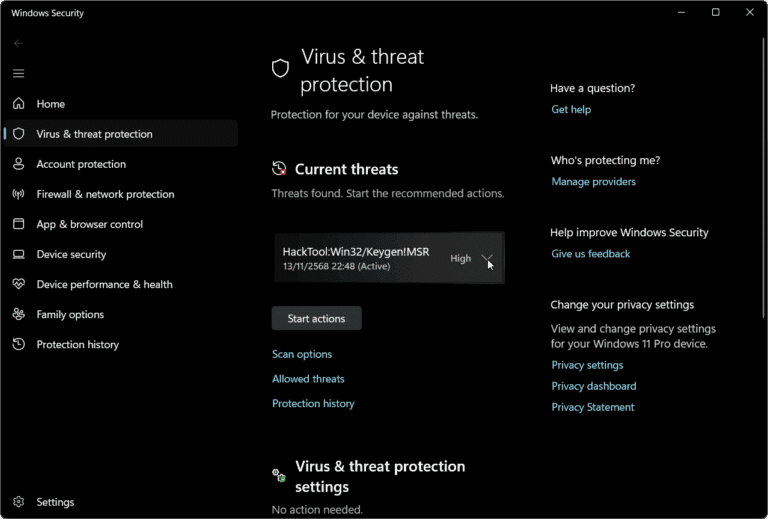
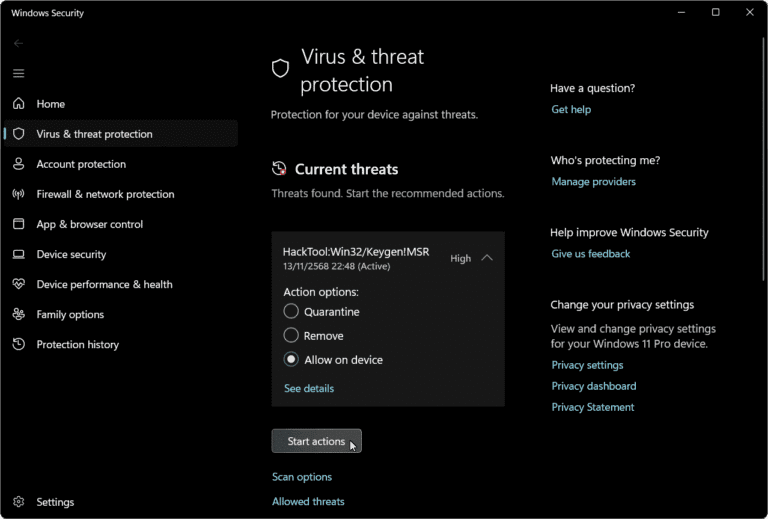
After this, the file will not be blocked by Defender again. The advantage is accuracy, as it only allows files that we intentionally permit.
Note:: Files that have already been approved are often reviewed again within a few weeks. Therefore, you don't need to worry that allowing multiple files will compromise the system's security.
3. Other Methods Related to Windows Security
3.1 Recover deleted files and those permitted from “Protection history”
If the file has been deleted or quarantined, follow these steps:
- Open Windows Security
- Scroll down and press. Protection history
- Looking for blocked items (will be written as Threat Quarantined Or Threat Blocked (with file name)
- Click on that item.
- Press the button. Action Then press. Restore
- If Windows asks for permission, click Yes
3.2 Adding Files/Folders to “Exclusions” (Excluding from Scanning)
- Open Windows Security
- In the topic Virus & threat protection settings Select. Manage Settings
- Scroll down. Exclusions
- Press Add or remove exclusions
- Press Add an exclusion
- Select what you want to exclude:
- File (Single File)
- Folder
- File type (.exe, .dll, etc.)
- Process (Process name, such as game.exe)
- Once added, Windows Defender will immediately stop scanning that file.
Precautions:: File added in “Exclusions”WillDid not return for inspection.It's the same as the method for pressing "allow," soOnly files or folders that you are certain about should be added.